
Illustrated maintenance guide · Epson ET-2720
Empty the waste ink collector. Get ready to print.
Resetting the counter does not remove ink. Our original photos show how to remove the ET-2720 collector, service its pads and refit everything.
Prepare your printer and workspace
You need a Phillips screwdriver, a small flat-head screwdriver or similar tool and paper towels. Turn the printer off and disconnect the power and USB cables. Place it on a large, protected surface with paper towels underneath to catch any escaping ink.
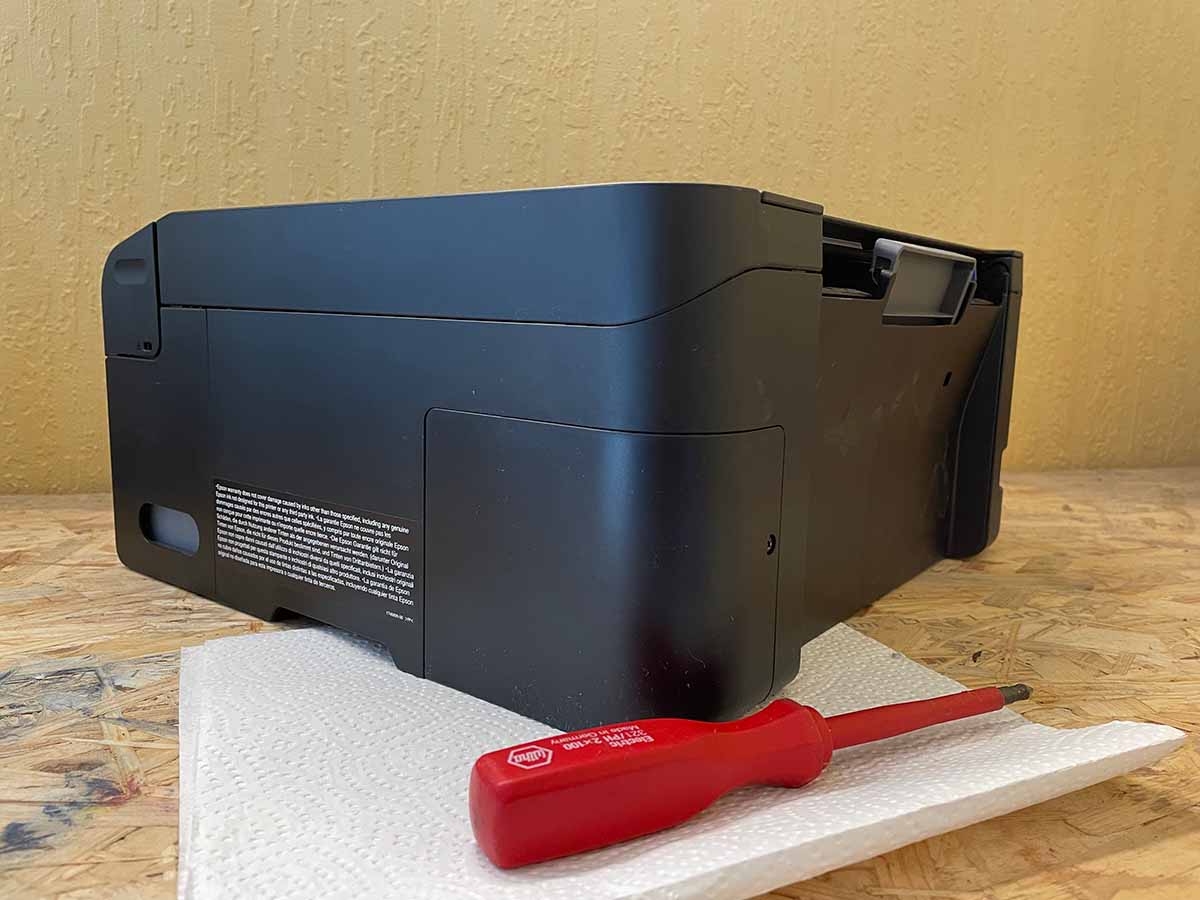
Open the cover
On the Epson ET-2720, the waste ink collector is at the rear right. Remove the cover screw shown in the photos and carefully take off the cover. Its position and fastenings may differ on other models.
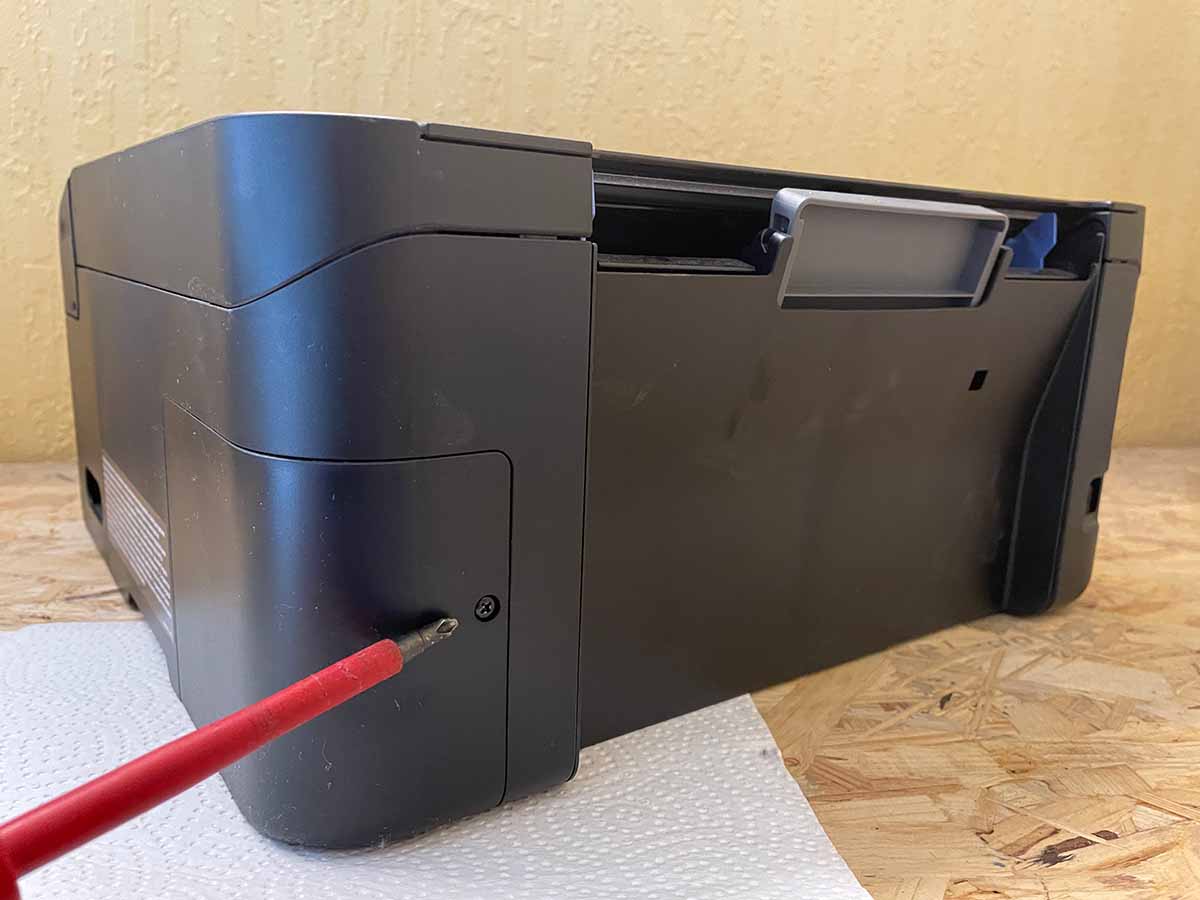
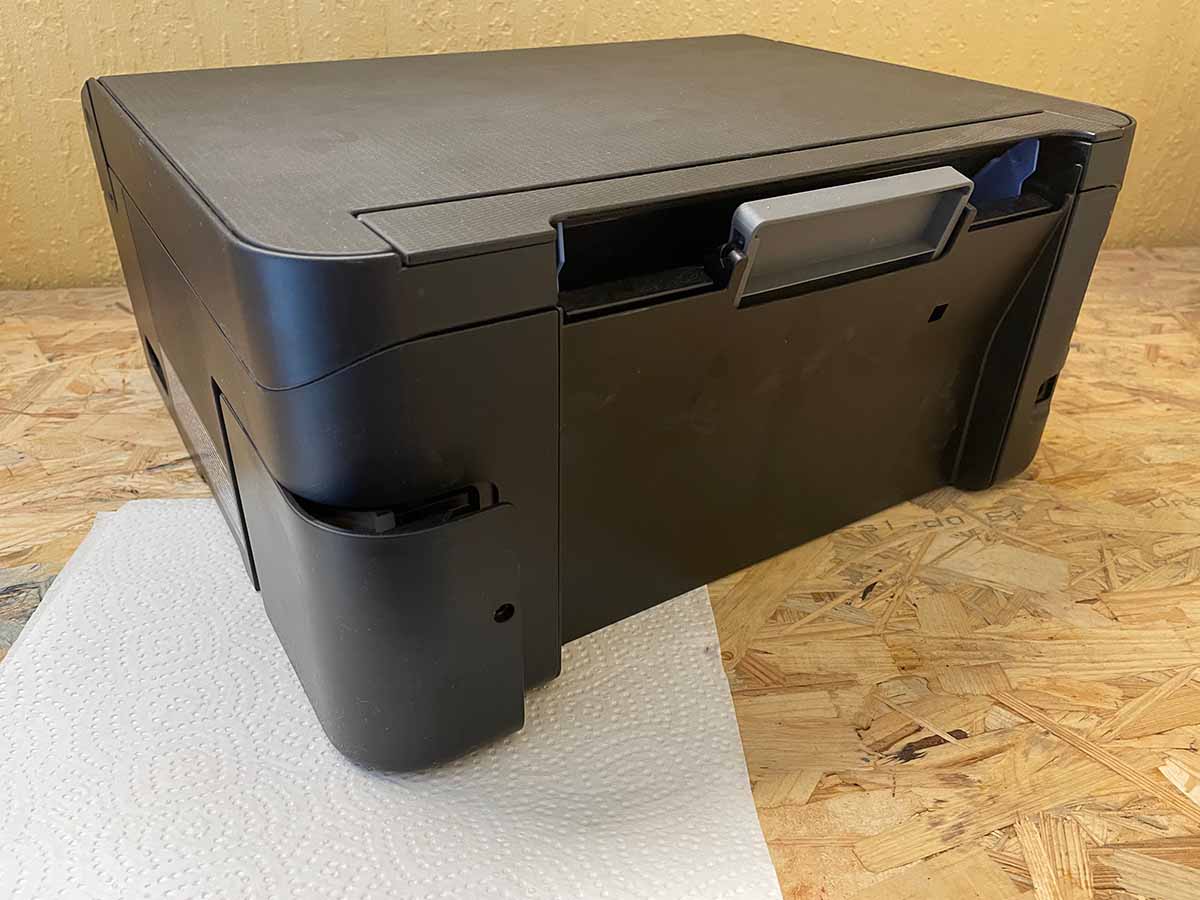
Release and remove the collector
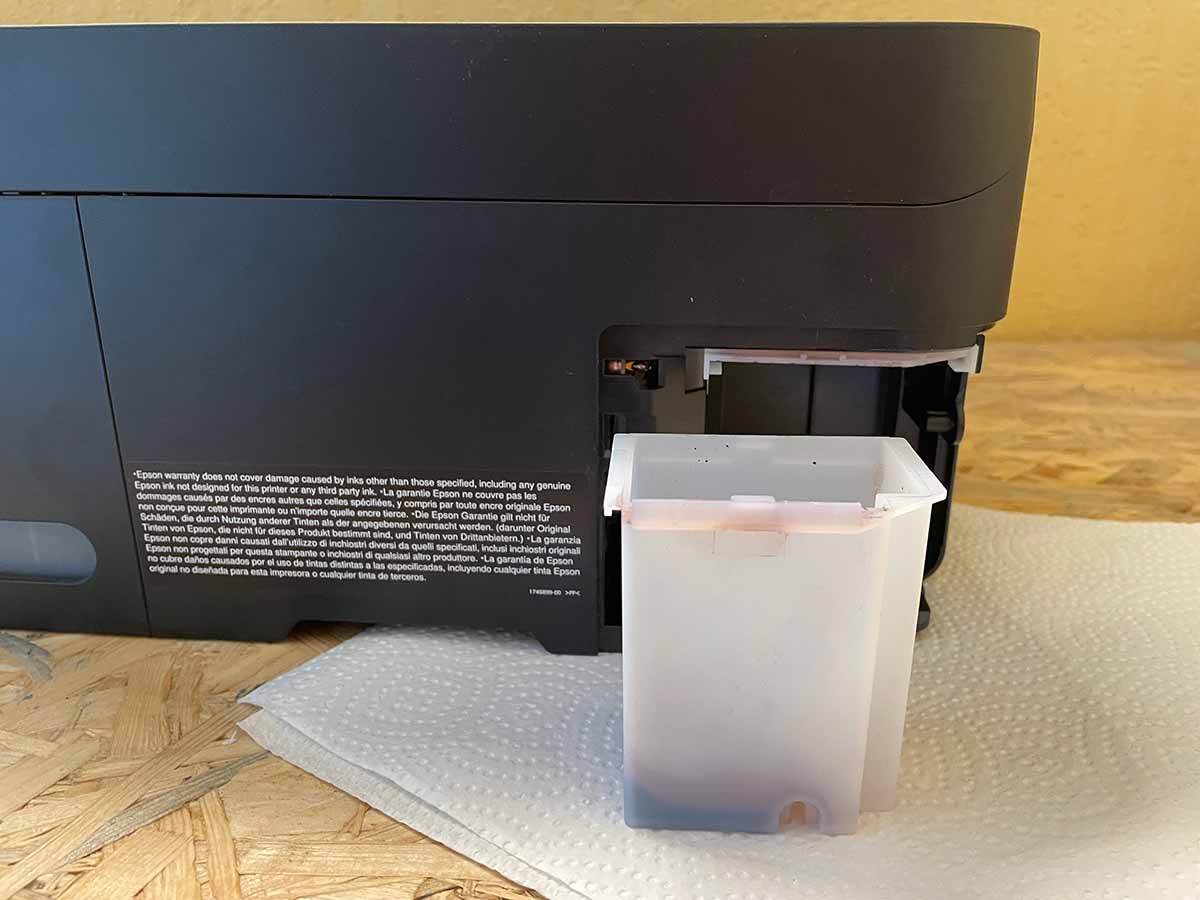
Remove the lower retaining screw from the waste tank as well. You can then remove the collector from the printer. Keep it as level as possible and use paper towels to catch any ink.
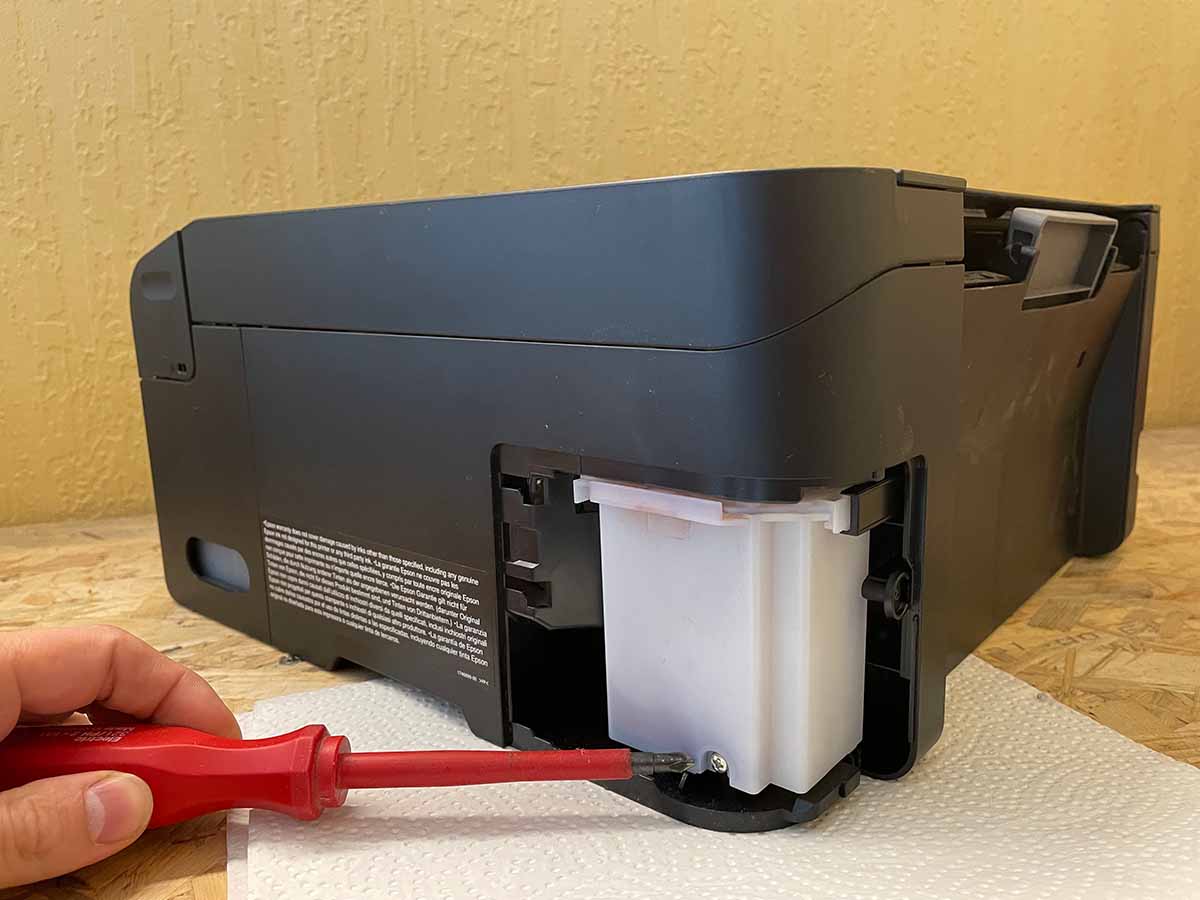
Carefully release the clip
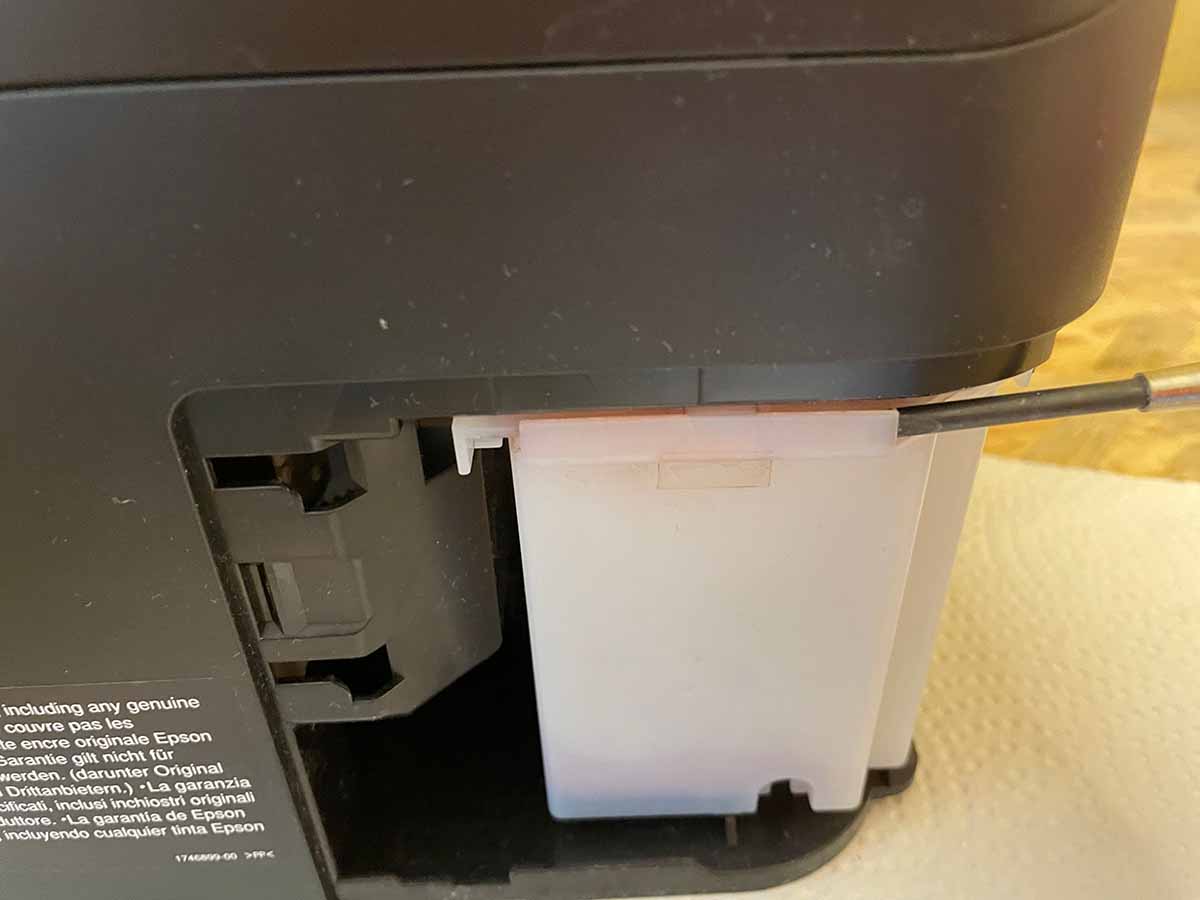
The collector is clipped into the cover. Carefully slide the small flat-head screwdriver into the guide from the side and release the clip. Do not force it: both the clip and collector need to remain intact.
Clean or replace the ink pads
Inside the collector are the waste ink pads: sponges that absorb excess ink. Replace them with compatible pads or clean them as described in the original guide. Cleaned pads must dry completely before refitting. Replace pads if damaged or no longer absorbent.
Reassemble and check
Refit completely dry or new pads. Reassemble in reverse order: engage the clip, secure the collector, refit the cover and tighten its screw. Reconnect the printer only after reassembly. Use WIC Reset Utility to check the counter and, if needed, perform a supported reset with the correct key. Check for leaks after the first use.
Unsure about a step?
Send us your exact printer model and a photo of the part you are working on so we can help.
Ask for help →